EJK Fuel controller Instalation


marthy

New member
Joined
Sep 26, 2013
Messages
233
Reaction score
0
Points
0
Location
Boynton Beach, FL
FZ-09 EJK Fuel controller installation
EJK FUEL CONTROLLER INSTALATION INSTRUCTIONS

Before starting the installation of your EJK fuel controller, let’s make sure you have the following tools available.

• 4mm Allen key
• 5mm Allen Key
• 10mm socket and ratchet
• Pliers
• Flush cuts or cutters
• 8 tie raps

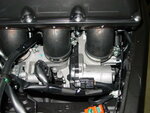
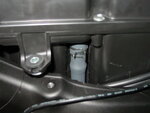
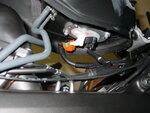
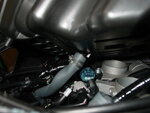
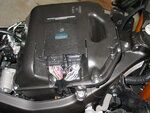
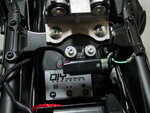
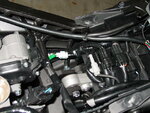
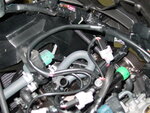
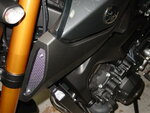
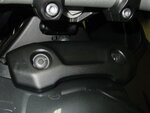
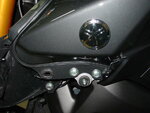
First step is to remove your seat and fuel tank. Starting with the side plastic covers, remove the bolt on each side with the 4mm Allen key. Then remove the push pins by pushing the middle piece in and pulling it out. Same with the cover behind the handlebars. From there you can remove the 6mm bolts with the 10mm socket.
 

Attachments

Last edited:

marthy

New member
Joined
Sep 26, 2013
Messages
233
Reaction score
0
Points
0
Location
Boynton Beach, FL
It is better if you let the engine cool down a bit before you disconnect the fuel line. It takes time for the pressure to bleed down in the fuel line. It is always recommended to use a rag to pick up the little amount of fuel that might leak out the fuel line. Now that all the bolts are removed you can lift the front of the tank and disconnect the hose and electrical connector for the fuel pump. Notice the orange plastic guard over the fuel line fitting; make sure you lock it back once you reconnect the fuel line at the end. Simply pull on the 2 vent hoses. You can now remove the fuel tank and lay it on the ground, use a towel to protect the pain.

Next step is to remove the airbox. There’s one bolt near the triple tree and 2 on each side of the airbox. Once all the 3 bolts removed, loosen the 3 hose clamp bolts on the throttle bodies. You can pull the airbox up a bit and disconnect both hoses. Notice how they are installed since you need to reconnect them the same way afterward. The hose on the LH side will need to be block (AIS system) to avoid excessive exhaust popping if you install an aftermarket exhaust. Remove the ECU from the top of the airbox and just let it lay down for now. Don’t forget to cap the hose and the airbox. Notice here in pic #2 (2740) that I insert a plug in the hose to block the AIS system. Same as block off plates. That will greatly reduce the exhaust popping on deceleration.
 

Attachments

Last edited:

marthy

New member
Joined
Sep 26, 2013
Messages
233
Reaction score
0
Points
0
Location
Boynton Beach, FL
Now that you have access to the injectors, let install the EJK fuel controller. The space in front of the battery is perfect since it will give you easy access for future tuning. Use the Velcro supply with your kit to secure the controller in the storage area. Lay your wire loom on the RH side of the chassis, all the way to the injectors. Use some tie rap to secure the wire safely. Make sure the loom is not in contact with any sharp edge to avoid damage to the loom. When you are ready, disconnect each injector. Be careful not to pull on the wire but the plastic connector itself. Push on the release tab (forward) then up. If you notice on the picture bellow, the controller comes with 3 sets of male/female connectors. Make sure each injector plug at one end of the controller and connect the same corresponding end to the injector. Do one injector at the time not to mix them. Once all connected, use a few tie rap to secure the loom properly. Do not tie rap the connector on top of the fuel rail. The clearance is very tight between the airbox and fuel rail and the airbox will not fit right. Tie the 2 injectors on the RH side together as shown and the left side.

The way the loom is built, you can mount the controller to the handlebars. But if hook to the battery it us recommended to cut the terminal off the ground wire and simply pull the wire off the protective sleeve. Then crimp a new terminal and connect to the battery.


Once all the injectors are connected and secure properly, it’s now time to connect the ground wire (black) to the battery. Then again, use tie raps to secure the wire properly to avoid damage. Your EJK fuel controller is now installed. Follow the reverse process to reassembly your bike together. Make sure the controller is set for your exhaust set up and other modifications.
 

Attachments

Last edited:

marthy

New member
Joined
Sep 26, 2013
Messages
233
Reaction score
0
Points
0
Location
Boynton Beach, FL
SETTINGS

Marthy Exhaust (Best setting on the road tune)

G: 5.5 | Y: 3.5 | R: 3 | GB: 3 | YB: 4.5 | RB: 4

Marthy Exhaust with airbox mod (Complete open inlet area)

G: 6 | Y: 4.5 | R: 3.5 | GB: 3 | YB: 4.5 | RB: 4

Marthy Exhaust Dyno tune

G: 5.5 | Y: 5.5 | R: 3.5 | GB: 3 | YB: 4.5 | RB: 4

Stock Exhaust Tune

G: 5.5 | Y: 3 | R: 3 | GB: 3 | YB: 4.5 | RB: 4

Stoltec Flashtune ECU (Flashtune mode A, Stoltec mode STD with PCV custom decel map)

G: 4 | Y: 4.0 | R: 2.5 | GB: 4 | YB: 4.5 | RB: 4

Those are the setting that I found to be the best. Time will tell with customer review witch setting will be better for different region. I'm in West Palm Beach, FL here... few feet over sea level using premium pump gas (E10)

NOTE: Either of those tune will be over ride by the O2 sensor when the ECO icon is on on the dash. Meaning the ECU keep the air fuel ratio at 14.7:1. If you are considering using this controller on a track day or spirit riding I will recommend you to disconnect the O2 sensor. The on/off throttle is perfect but if left disconnected while riding the flat slab at constant speed the ECU will go in safe mode and run 12.5:1 or so. Very rich and MPG will considerably be down. Disconnecting and reconnecting the O2 sensor takes few second and do not need any special tool.

If any thing is not quite clear please inbox me and I will make the necessary change.

Thanks,

Martin
 

RipGroove

Active member
Joined
Feb 27, 2014
Messages
1,355
Reaction score
2
Points
38
Location
UK
Just to add some more info to the thread, here's my set up which was achieved by info from Marthy:

G: 5.5 | Y: 4 | R: 3 | GB: 3 | YB: 3.5 | RB: 3.5

Bikes C0 settings on 14
Stock ECU
Akrapovic Exhaust with DBK out

With the EJK fitted everything seems a lot smoother with reduced engine braking. G2 throttle also installed to make things even smoother.


Top